
Selling coins online means your photos have to do all the talking. If they look dull or blurry, people will just scroll past. Getting good shots isn’t some big secret, though. It’s mostly about paying attention to a few details, like how you light the coin and what you put behind it. We’ll go over how to make your coins look their absolute best so they sell faster.
Key Takeaways
- Start with clean coins and the right gear. Make sure your coins are dust-free and use a decent camera, maybe with a macro lens, for clear shots.
- Lighting is everything. Use soft, diffused light, like from a window or a lightbox, to avoid glare and show off the coin’s details.
- Think about your background and angles. A simple, uncluttered background makes the coin stand out, and shooting from different angles shows off all its features.
- Focus on the details. Use close-up shots to highlight any special markings, wear, or craftsmanship that make the coin unique.
- Keep it consistent. Using the same setup for all your coin photos makes your listings look professional and builds trust with buyers.
Essential Preparation for Photographing Coins
Before you even think about pressing the shutter button, a little prep work goes a long way in making your coin photos shine. It’s not just about having a nice camera; it’s about treating your coins with respect and getting them ready for their close-up. Think of it like getting dressed up for a special occasion – you want to look your best, and so do your coins.
Proper Handling and Storage Techniques
Handling coins correctly is super important. You don’t want to add fingerprints or scratches right before you take a picture. Always use clean cotton gloves when you’re handling your coins. If you don’t have gloves, make sure your hands are freshly washed and completely dry. Avoid touching the coin’s surface directly. Instead, hold them by the edges. For storage, acid-free holders, like Mylar flips or inert plastic cases, are your best bet. This keeps them safe from environmental damage and makes them easier to handle during shoots.
- Always wear clean cotton gloves.
- Handle coins by their edges, never the faces.
- Store coins in acid-free, inert plastic holders.
- Keep coins away from moisture and extreme temperatures.
Cleaning Coins for Optimal Clarity
This is a tricky one, and honestly, it depends on the coin. For modern, circulated coins, a gentle wipe with a soft, lint-free cloth might be all you need to remove surface dust. However, for older or valuable coins, cleaning can actually decrease their value. It’s often better to leave them as-is or consult with a professional numismatist. If you do decide to clean, use distilled water and a very soft brush, and always test on an inconspicuous area first. Never use harsh chemicals, abrasive pads, or metal brushes.
The goal with cleaning is to remove loose debris that might obscure details, not to make the coin look brand new. Over-cleaning can damage the patina and surface, which are often desirable characteristics for collectors.
Selecting the Right Equipment for Coin Photography
While you don’t need a professional studio, having a few key pieces of equipment makes a big difference. A tripod is a must-have to keep your camera steady, especially for close-ups. A macro lens or a camera with a good macro mode will let you capture all those tiny details. A simple light tent or diffuser can help create soft, even lighting, which is key for avoiding glare. Even a smartphone can work if you have a good macro attachment and a stable setup.
Here’s a quick rundown:
| Equipment | Purpose |
|---|---|
| Tripod | Camera stability, sharp focus |
| Macro Lens/Mode | Capturing fine details up close |
| Light Tent/Box | Soft, diffused, even lighting |
| Diffusers | Soften harsh light sources |
| Cotton Gloves | Protect coin from fingerprints and oils |
Mastering Lighting for Coin Photography
Getting the lighting right for coin photos is a big deal. It’s not just about making the coin visible; it’s about showing off its details, its shine, and its overall feel. Bad lighting can make even a rare coin look dull, while good lighting can make a common one pop. So, let’s talk about how to make your coins look their best under the lights.
Utilizing Diffused and Symmetrical Lighting
When you’re shooting coins, especially those shiny metal ones, you want light that’s soft and even. Think about how light hits a pearl – it’s smooth, not harsh. The same idea applies here. Harsh light creates bright spots and deep shadows that hide details. Diffused light spreads out, filling in those nooks and crannies so you can see everything.
- Use a lightbox: These are great because they have translucent sides that soften the light coming from your lamps. It’s like shooting through a thin curtain.
- Softboxes or umbrellas: If you have photography lights, these accessories do the same job as a lightbox, spreading the light out.
- Position lights evenly: Try placing your lights on either side of the coin, maybe at a 45-degree angle. This symmetrical setup helps light both sides of the coin equally, reducing weird shadows.
The goal is to make the coin look like it’s glowing, not like it’s under a spotlight. You want to see the texture, the wear, and any subtle markings without being blinded by glare.
Leveraging Natural Daylight Effectively
Who needs fancy equipment when you have a window? Natural light from a window can be fantastic for coin photography. It’s usually soft and has a nice color to it. The trick is to use it smartly.
- Find an overcast day: Overcast days are perfect because the clouds act as a giant diffuser, giving you that soft, even light without direct sunbeams.
- Position near the window: Place your coin setup close to a window, but not in direct sunlight. You want the light to wrap around the coin.
- Bounce light: If one side of the coin is a bit too dark, use a white piece of card or foam board on the opposite side of the window. This bounces some of the light back onto the darker side, balancing things out.
Avoiding Harsh Overhead Illumination
This is a big one. Most people’s first instinct is to just turn on the room light or use a lamp directly above the coin. Don’t do it. Overhead lighting is usually the enemy of good coin photos.
- Creates unflattering shadows: Light coming straight down will cast shadows into the coin’s details, making them look muddy or completely disappear.
- Causes glare: Direct overhead light often bounces straight back into the camera lens, creating a blown-out white spot that hides everything.
- Uneven illumination: It lights the top of the coin brightly but leaves the sides and edges in shadow.
If your only option is overhead light, try to diffuse it as much as possible. You could hang a thin white sheet or piece of fabric between the light and the coin, but honestly, finding a side-lighting solution is usually much better.
Camera Angles and Composition for Coin Listings
Getting the right shot of a coin isn’t just about pointing and clicking. The angle you shoot from and how you arrange the coin in the frame can make a huge difference in how appealing it looks to potential buyers. Think of it like presenting a piece of art – you want to show it off in the best possible light, from the most flattering viewpoints.
Experimenting with Camera Angles
Don’t just take one picture from straight above. Coins have depth and detail that can be missed with a flat, top-down view. Try tilting your camera slightly. This can help show off the coin’s thickness and any relief work, like raised designs or portraits. Sometimes, a very slight angle can catch the light in a way that makes the details pop. It’s all about finding that sweet spot where the coin looks its best.
- Slight Angle: Aim for a 10-20 degree tilt to reveal relief and texture.
- Eye-Level (if possible): For larger coins or when using a tripod, shooting closer to eye-level can give a sense of presence.
- Oblique Views: Experiment with shooting from the side to highlight edge details or mint marks.
Achieving Sharp Focus with Macro Shots
Coins are small, and their details are often intricate. To really show off what makes a coin special, you’ll likely need to get close. This is where macro photography comes in. The goal here is to get everything in focus, from the highest point of a design to the deepest part of an inscription. A common issue is that only a thin slice of the coin might be sharp, while the rest is blurry. This is where techniques like focus stacking can really help, though even without it, careful focusing is key.
When focusing on a coin, especially with macro lenses, the depth of field can be incredibly shallow. This means only a very narrow plane will be sharp. You need to be deliberate about where you place that plane of focus to capture the most important details.
Capturing Multiple Perspectives
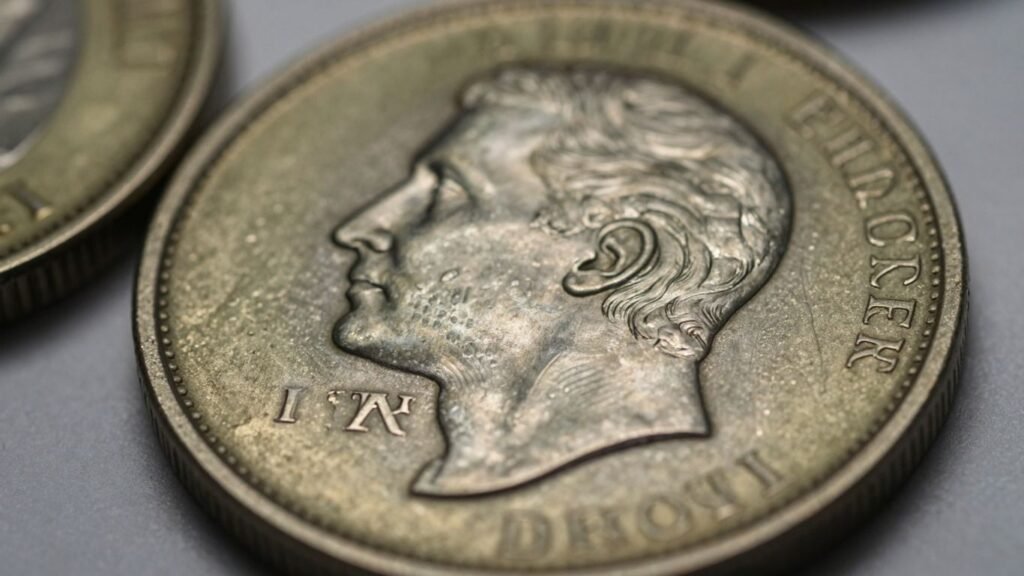
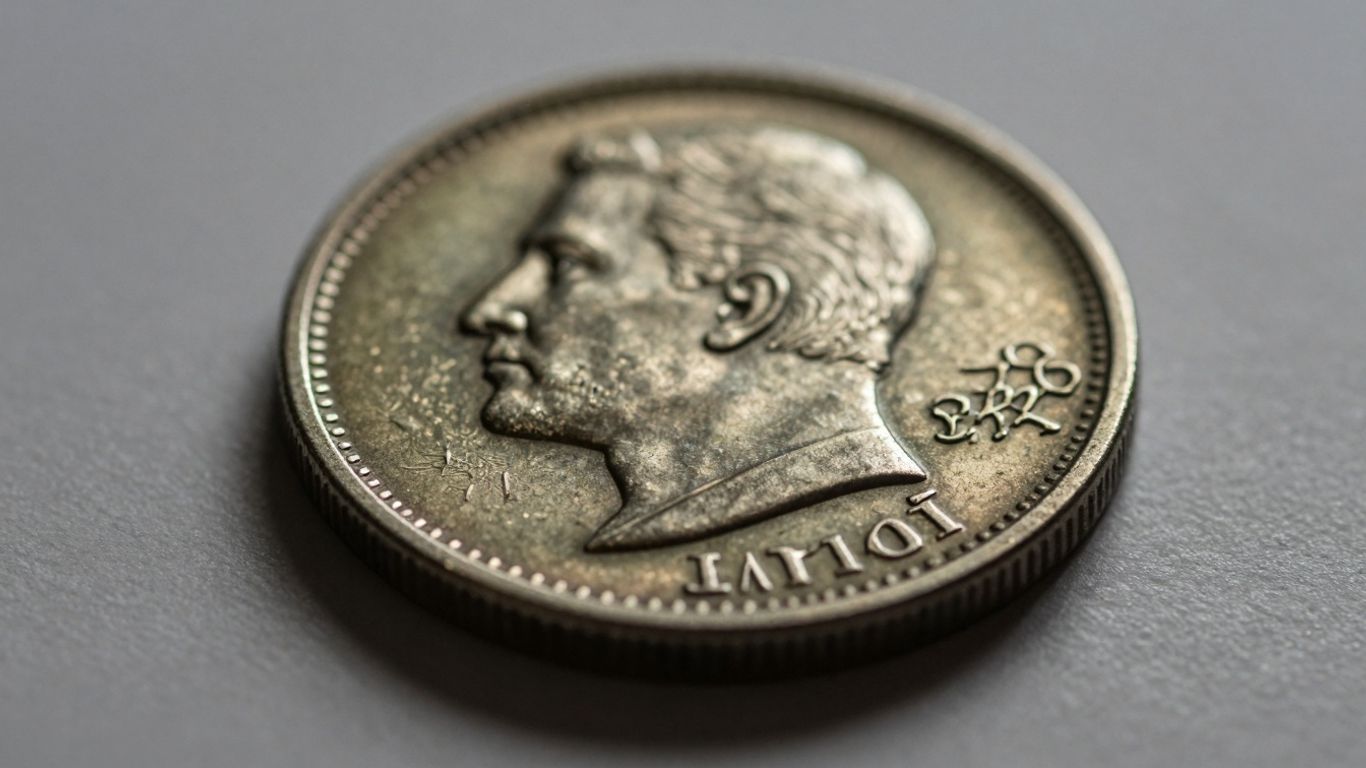
Buyers want to see as much as possible before they commit to a purchase. Showing a coin from just one angle isn’t enough. You need to provide a full picture. This means showing the front (obverse), the back (reverse), and often the edge. If there are any unique marks, errors, or special features, make sure you have close-up shots of those too. Think about what you would want to see if you were buying the coin.
| View | Description |
|---|---|
| Obverse | The primary or "heads" side of the coin. |
| Reverse | The secondary or "tails" side of the coin. |
| Edge | The side of the coin, showing reeding or text. |
| Close-up | Detailed shot of specific features or errors. |
Creating Engaging Coin Visuals with Backgrounds
Choosing Appropriate Backgrounds
The background you pick for your coin photos really matters. It’s not just about filling space; it’s about making the coin itself pop. Think about what you’re trying to convey. For a coin with a lot of history, maybe a textured, slightly worn surface like linen or a dark, smooth wood could work. If it’s a modern commemorative coin, a clean, solid color might be better. The goal is to make the coin the undisputed star of the show. Avoid busy patterns that distract the eye. Sometimes, a simple, neutral background is all you need to let the coin’s details shine through.
Incorporating Themed Elements
Sometimes, a little theme can go a long way in telling a story with your photo. If you’re selling a coin from a specific country, maybe a subtle hint of that country’s flag or a recognizable landmark in the background, blurred out, could add context. For a coin featuring an animal, perhaps a very soft, out-of-focus natural element could tie in. Just remember, these elements should support, not overpower, the coin. It’s a delicate balance.
Using Props to Enhance Context
Props can be tricky. They can either add a lot of character or just make a mess. Think about what kind of prop would naturally go with the coin. For example, if you’re selling an old silver dollar, maybe a vintage-looking magnifying glass or a small stack of other old coins (carefully arranged, of course) could work. For a coin related to a specific event, a small, relevant artifact could be used. Here’s a quick rundown of what to consider:
- Relevance: Does the prop actually relate to the coin’s history, theme, or origin?
- Scale: Is the prop too big or too small compared to the coin?
- Distraction: Does the prop pull attention away from the coin itself?
- Cleanliness: Are the props clean and free of smudges or damage?
A good rule of thumb is to use props sparingly. Less is often more when you want the coin to be the main attraction. If a prop feels forced or unnecessary, it’s probably best to leave it out. The coin should always be the hero of the image.
Showcasing Coin Details and Authenticity
When you’re selling coins, people want to see exactly what they’re getting. It’s not just about a pretty picture; it’s about showing the coin’s real story and making sure buyers trust you.
Highlighting Material and Craftsmanship
Coins are made from different metals, and how they were made really matters. Think about the metal itself – is it shiny, dull, or does it have a unique patina? The way the coin was struck also tells a story. Look for signs of the minting process, like the sharpness of the design or any slight imperfections that actually add character. The goal is to capture the tangible quality of the coin.
Examining Edge Inscriptions and Unique Iconography
Don’t forget the edges! Many coins have inscriptions, reeding, or even decorative patterns on their sides. These details can be super important for identifying a coin and proving its authenticity. Also, pay close attention to the main images and symbols on the coin. Are there any unusual elements, historical figures, or emblems that are specific to a certain time or place? These unique bits of iconography are what make a coin special and can be a big selling point.
Using Close-Ups for Intricate Details
Sometimes, the most important details are tiny. You’ll need to get in close to show off things like:
- Fine lines in a portrait
- Small mint marks
- Wear patterns that indicate age
- Any damage or unique features
These close-up shots, often called macro shots, let potential buyers inspect the coin thoroughly. It’s like giving them a magnifying glass through your photos. This builds confidence and can help justify the price, especially for rare or valuable pieces.
Advanced Techniques for Stunning Coin Photos
Focus Stacking for Enhanced Depth
Sometimes, getting the whole coin in sharp focus, especially with intricate details or thicker coins, can be a real challenge. That’s where focus stacking comes in. It’s a technique where you take multiple photos of the same coin, each with a slightly different focal point. Then, you use software to blend these images together, creating one final picture where everything from the rim to the center is crystal clear. It takes a bit of practice, but the results are seriously impressive, making your coin look incredibly detailed and professional.
Understanding Reflections and Highlights
Coins, especially those made of precious metals, are super reflective. This can be both a blessing and a curse. You want to show off that shine, but you don’t want distracting glares or weird reflections of your camera or studio. The trick is to control the light. Think about using soft, diffused light sources that spread out evenly. You can also use small flags or cards to block light from hitting certain areas, shaping the reflections to highlight the coin’s features without showing unwanted elements. Mastering how light bounces off the metal is key to making your coin look its best.
Exploring Three-Point Lighting Setups
For a really polished look, a three-point lighting setup can make a big difference. It involves three lights:
- Key Light: This is your main light source, providing the primary illumination for the coin.
- Fill Light: A softer light, usually placed opposite the key light, used to fill in shadows and reduce contrast.
- Backlight (or Rim Light): Positioned behind the coin, this light creates a subtle outline, separating the coin from the background and adding a sense of depth.
Experimenting with the intensity and position of each light allows you to sculpt the coin’s appearance, bringing out its texture and form in a way that’s both realistic and appealing. It’s about creating a controlled environment where the coin is the undisputed star.
This setup helps to define the coin’s shape and texture, giving it a three-dimensional feel that static, flat lighting just can’t match. It might sound complicated, but even simple adjustments can lead to a much more dynamic image.
Post-Processing for Professional Coin Images
So, you’ve taken some decent photos of your coins, but they still look a bit… flat? That’s where post-processing comes in. It’s not about faking anything, but rather about making the photos look as good as the coin does in real life, maybe even a little better. Think of it as giving your coin photos a nice polish.
Editing Exposure and Contrast
This is usually the first step. Sometimes the lighting wasn’t quite right, or the camera just didn’t capture the full range of light and dark. You want to make sure the coin is clearly visible without being too dark or washed out. Adjusting the contrast helps bring out the details, making the raised parts pop and the recessed areas look deep.
- Boost brightness if the image is too dark.
- Lower brightness if it’s too bright or washed out.
- Increase contrast to make details stand out.
- Decrease contrast for a softer look, if needed.
Adjusting Colors for Accuracy
Coins, especially older ones, can have subtle color variations. You want your photos to show the true color of the metal – is it a warm gold, a cool silver, or a coppery bronze? Sometimes the camera’s white balance can be off, making a silver coin look a bit yellow, for example. Getting the colors right is pretty important for buyers who want to know exactly what they’re getting. It’s also a good idea to check out professional guides covering a wide range of topics related to collectibles to understand material nuances.
Applying Sharpening with Precision
This is where you can really make the coin’s details pop. A little sharpening can bring out the fine lines of an engraving or the texture of the metal. But be careful! Too much sharpening looks artificial and can create weird halos around edges. It’s a delicate balance. You’re aiming for crispness, not a crunchy look.
The goal here is to refine what’s already there. You’re not adding details that weren’t captured, but rather making the existing details more visible and clear to the viewer. It’s about clarity and presentation, making sure the coin’s true character shines through without any digital trickery.
Ensuring Consistency in Coin Photography
When you’re selling coins online, making sure every listing looks like it belongs to the same collection is a big deal. It makes your shop look professional and helps buyers trust what they’re seeing. Think about it: if one coin photo is super bright and sharp, and the next is dark and blurry, it’s a bit jarring, right? Keeping things uniform across all your coin pictures builds a cohesive look that’s easy on the eyes and good for your brand.
Establishing a Shooting Template
This is where you lay the groundwork for uniformity. A shooting template isn’t some complicated blueprint; it’s just a set of rules you follow every single time you take a picture. It means deciding on the basics beforehand so you don’t have to guess later.
- Background: Pick one color or texture and stick with it. A plain, neutral background usually works best so the coin is the star.
- Lighting Setup: Decide on the direction and type of lights you’ll use. Will it be soft, diffused light from the side, or something else? Document it.
- Camera Settings: Note down your aperture, shutter speed, and ISO. These numbers are your friends for consistent results.
- Distance and Angle: Determine the standard distance from your coin and the typical angle you’ll shoot from.
Maintaining Uniform Lighting and Angles
Lighting and angles are probably the most important parts of making your photos look alike. Even small changes can make a coin look different. You want the light to hit the coin in the same way each time, showing off its details without creating weird shadows or glare. This means setting up your lights once and then just placing the coin in the same spot for each shot.
Consistency in your photography isn’t just about making things look pretty; it’s about building a reliable visual language for your customers. When they see your photos, they should immediately recognize them as yours, and know they’re looking at a clear, honest representation of the coin.
Creating a Cohesive Brand Image
Your coin photos are a big part of your brand. If you’re selling a lot of coins, having a consistent look across all your listings makes your shop memorable. It tells potential buyers that you pay attention to detail and take your business seriously. This visual consistency can really help build trust and make customers feel more confident when they decide to buy from you. It’s like having a signature style, but for your product photos. It helps your listings stand out from the crowd and makes your online shop feel more polished and professional.
Adding Scale and Context to Coin Listings
When you’re selling coins online, people really need to get a sense of just how big or small they are. It’s not always obvious from just looking at a picture, right? That’s where showing scale comes in. It helps potential buyers understand the actual dimensions and proportions of the coin, making it easier for them to decide if it’s what they’re looking for.
Including Scale References
One of the simplest ways to show scale is by placing the coin next to a common object. Think about what people see every day. A ruler is a classic choice, especially if you’re photographing coins for insurance purposes, as it gives precise measurements. But you can also use other items that are easily recognizable. A well-placed common object can make all the difference in a buyer’s perception of size.
Here are a few ideas for scale references:
- A standard ruler (with clear inch and centimeter markings)
- Another, more common coin (like a quarter or a penny, if your coin is significantly different in size)
- A small, neutral object like a plain button or a USB drive
- A coin holder or slab, if that’s how you typically store them
Remember to keep the scale reference neutral and not distracting. The focus should always remain on the coin itself. You can find more tips on photographing items for insurance that touch on scale references.
Showing Coins in Use
This might sound a bit odd for coins, but think about context. If you’re selling a coin that’s part of a set or has a specific historical use, showing it alongside something related can add a lot of appeal. For example, if you have a coin that was historically used in a particular game or as currency in a specific region, a subtle nod to that context can be interesting. This is less about precise measurement and more about telling a story or evoking a feeling about the coin’s history or purpose.
Providing Size Context with Common Objects
Beyond just a ruler, using everyday objects can be really effective. Imagine a coin next to a standard coffee mug or a set of keys. This gives a very relatable sense of size. It’s about making the abstract concept of coin dimensions concrete for the viewer. The key is to choose objects that are universally understood and don’t detract from the coin. You want the buyer to immediately grasp the coin’s size without having to think too hard about the comparison object.
When you’re taking these shots, make sure the lighting is consistent across both the coin and the scale object. You don’t want one looking artificially bright or dark compared to the other. Also, try to keep the background simple so the coin and its scale reference are the clear stars of the show. This approach helps build trust and reduces the number of questions you’ll get about size.
Handling Reflective Surfaces in Coin Photography
Coins, especially those made of precious metals like gold or silver, are notoriously shiny. This reflectivity can be a real pain when you’re trying to take photos for your listings. All those bright spots and glare can hide important details or just make the coin look messy. The key is to control the light, not fight it.
Minimizing Fingerprints and Smudges
Before you even think about the camera, give your coin a gentle clean. Even the slightest smudge can show up as a big, distracting blob in your photo. Use a soft, lint-free cloth – think microfiber – to wipe down the coin. Avoid anything abrasive. If you’re dealing with an older coin, be super careful; sometimes, the patina is part of its charm and value, so cleaning might not be the best idea. Always handle coins by their edges to avoid transferring oils from your skin.
Using Soft, Diffused Lighting
Harsh, direct light is the enemy of reflective surfaces. It bounces off in sharp, uncontrolled ways, creating blown-out highlights and deep, obscuring shadows. Instead, you want soft, diffused light. Think about how light looks on a cloudy day – it’s even and gentle. You can achieve this by:
- Using a light tent or softbox: These are designed to spread light evenly.
- Bouncing light off a white surface: Position a white card or foam board near your coin to reflect light onto it softly.
- Positioning lights indirectly: Aim your lights at a wall or ceiling behind the coin, letting the bounced light illuminate your subject. This is a great way to get even illumination and avoid harsh shadows. The effectiveness of a lighting setup for ancient coins relies heavily on the reflectors, rather than the light source itself. Achieving the optimal lighting involves a blend of scientific understanding and intuitive adaptation, with each coin offering unique learning opportunities. learn more
Employing Polarizing Filters
This is where things get a bit more technical, but it’s super effective. A polarizing filter, which you can attach to your camera lens, works like sunglasses for your camera. It helps to cut down on glare and reflections by filtering out light waves vibrating in certain directions. You can often rotate the filter on the lens to find the sweet spot where reflections are minimized. This is especially useful when photographing coins with very smooth, mirror-like surfaces. It can make a huge difference in revealing the coin’s details without the distracting shine. Experimenting with different angles and filter positions is key to getting it just right.
Dealing with shiny objects in photography is all about managing how light interacts with the surface. Instead of letting the reflections dictate the image, you guide the light to reveal the coin’s true character. It takes a bit of practice, but the results are worth it for creating listings that truly shine.
Wrapping It Up
So, there you have it. Taking good pictures of coins for sale isn’t some big mystery. It’s really about paying attention to the little things, like making sure your coin is clean and that the light isn’t making a mess of the photo. Using simple tools, like a plain background and maybe a bit of editing, can make a huge difference. Remember, clear, sharp photos help buyers see exactly what they’re getting, which builds trust and can lead to more sales. Keep practicing, and your coin listings will start looking way more professional.
Frequently Asked Questions
Why is good lighting so important when photographing coins?
Think of light like a spotlight for your coin. Good lighting makes all the tiny details, like pictures and writing, really stand out. It helps people see exactly what they’re buying and makes the coin look its best, almost like it’s sparkling!
Should I clean my coins before taking pictures?
Sometimes, a gentle wipe with a soft cloth can help. But be super careful! Most old coins can lose value if cleaned too much. It’s often best to leave them as they are or just remove obvious dust. You don’t want to accidentally scratch them.
What kind of camera or phone should I use?
You don’t need a super fancy camera! Many smartphones today have great cameras. The most important thing is to get close enough to see the details. Sometimes, a simple tripod or stand can help keep your phone steady for clearer pictures.
What's the best way to show the coin's size?
It’s hard to tell how big a coin is just from a photo. A good trick is to place something common next to it, like a regular coin, a pen, or even a ruler. This gives people a clear idea of its actual size.
How do I avoid glare or reflections on the coin?
Shiny coins can be tricky! Try not to use a bright light shining straight on it. Instead, use soft, spread-out light, like from a window on a cloudy day or a lamp with a shade. Sometimes, taking the picture from a slight angle helps too.
What background works best for coin photos?
Simple is usually better! A plain, solid color background, like white, black, or gray, helps the coin be the main star. Avoid busy patterns that can distract the viewer. You want them looking at the coin, not the background.
How many pictures should I take of each coin?
More is usually better! Take pictures from the front, the back, and the edges. Close-up shots of any special markings or wear are also great. This lets buyers see everything about the coin before they decide to buy.
Do I need special software to edit my photos?
Basic editing can make a big difference! You can often use simple tools built into your phone or computer. Just making the picture a little brighter, clearer, or adjusting the colors slightly can make your coin listing look much more professional.